GIMP Tutorials

Gimp is an open-source alternative to high priced, professional graphics editing programs like Fireworks or Photoshop.


Intention

In this tutorial I'll show you how to do smart sharpening of your images. Applying an unsharp mask to an entire image is not always appropriate. A really good example of this is when you have an image with a lot of high ISO noise or film grain; applying across-the-board sharpening will enhance the noise/grain and make it even more visible, especially in large prints. Often there will be large areas of the image that you know you don't want to sharpen (e.g. a blue sky--the blue channel tends to get a lot of noise).

This technique does two "smart" things to avoid sharpening noise:

  1. sharpen only the luminosity channel, and
  2. create a channel mask that contains only the edges in the image. Then you can load the channel mask as a selection and apply the unsharp mask to just the edges.

Giving credit where credit is due: I did not come up with this method. I adapted it for GIMP from a Photoshop tutorial on the luminous-landscape.com photography web site (great web site BTW, I recommend it).

New information and comparison with the "warp sharp" script!

The Procedure

You may want to maximize your browser window to properly see this tutorial. I didn't want to shrink the image windows down like I usually do for the other tutorials since sharpening and noise are subtle and really show up better at these larger sizes.

Step 1

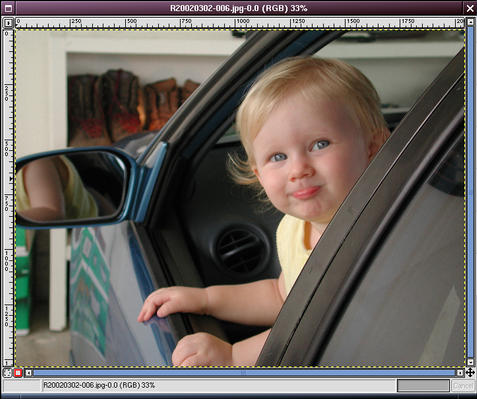
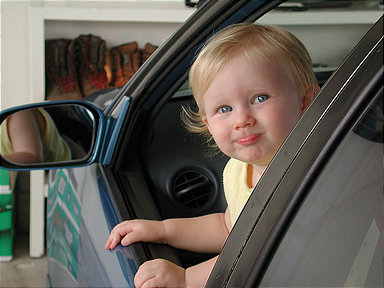
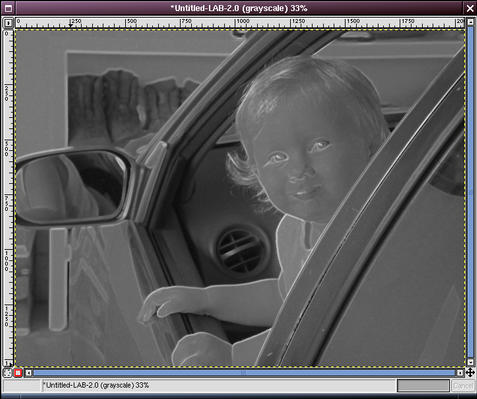
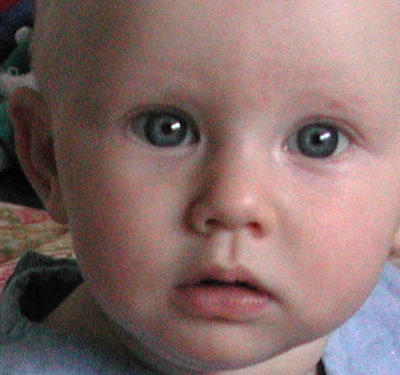
Here's the original image loaded into GIMP. It is noticeably soft, probably due to bad autofocus. It really shows up in prints.

Note: be sure to do any other editing that you want to on the image first, especially downsampling or upsampling (resizing). Sharpening should always be the last step that you do.

Step 2

Duplicate the image by pressing Ctrl+D or right-click and select Image -> Duplicate. It might be wise to minimize the original image window now. You can open it later to compare to the result.

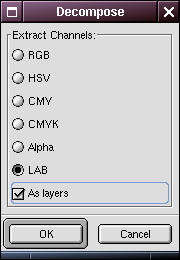
Right-click on the duplicate image and select Image -> Mode -> Decompose. In the decompose dialog box, select LAB (or HSV; see Note 1). Check the "As layers" checkbox (see Note 2) and click OK.

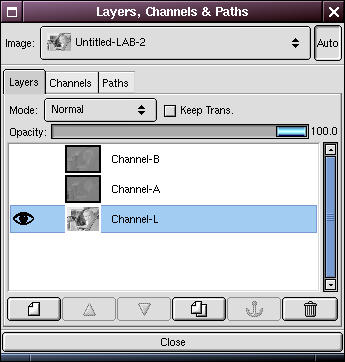
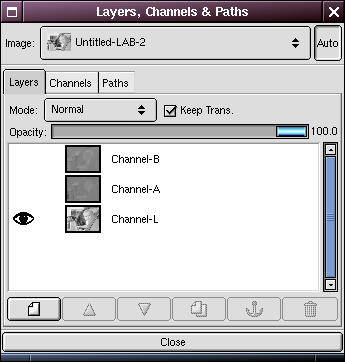
This will create a new window with the image decomposed into the Luminosity ("brightness"), A and B channels as 3 layers. This will allow us to isolate and sharpen the luninosity channel which is a) the most important, and b) should be the cleanest in terms of noise.

At this point I usually turn off visibility of the A and B layers in the Layers dialog by clicking on the "eyes".

Note 1: if you happen to have an older version of the compose/decompose plug-in it may not have the LAB option. In that case use HSV (hue/saturation/value) instead. For any reference to the "LAB" image or "luminosity" channel below, substitute the "HSV" image/"value" window. The LAB option was not in my initial version of GIMP (ver 1.2.1), but I got the newer version of the plug-in at the GIMP Plug-in Registry and compiled it myself. Don't worry if you don't have it; HSV works great too.

Note 2: in the older version of the decompose plug-in there is no "As layers" checkbox; instead it will create the three channels as separate windows rather than three layers in one window. It really doesn't matter if you do it this way; the layers way just reduces the clutter on your screen. If you don't have the "As layers" option, I suggest you minimize (but not close) the hue and saturation (or A and B) windows. We'll need them later, but you don't want to accidentally pick one of them in the next few steps.

Step 3

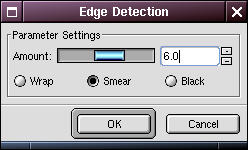
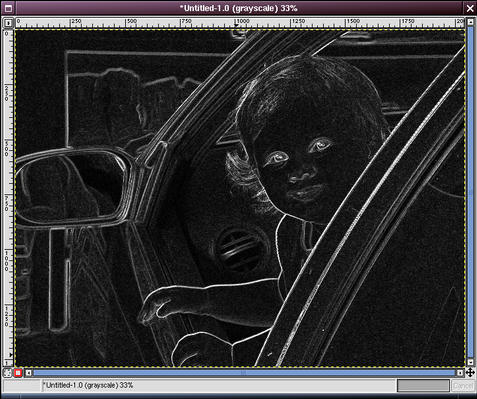
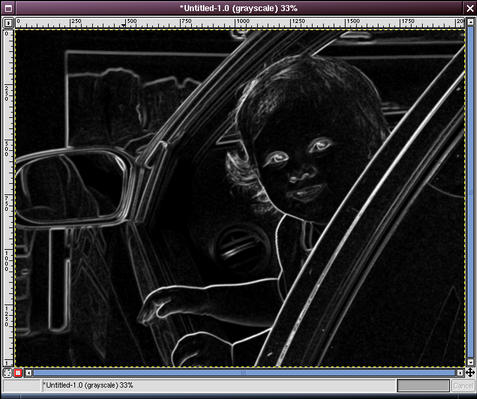
Go to the duplicate image. Right-click and select Filters -> Edge Detect -> Edge. In the Edge Detect dialog box, select a parameter value of the appropriate size for the edges in your image. You may need to experiment with this. For the example image I chose 6.

Now convert the edges image to grayscale by right clicking on it and selecting Image -> Mode -> Grayscale. This image is going to become our sharpening mask.

Note: in some tutorials they recommend converting to greyscale and then running the edge detection filter. The premise there (my guess) is that perhaps you don't want to find noise as edges. My thinking is that there may be an edge in color, but not tonality (e.g. transition between two light colors). Once you have converted to greyscale you may not be able to detect that edge any more. Besides, with a high enough edge detection parameter (here 6) you will avoid detecting random CCD noise as edges.

Step 4

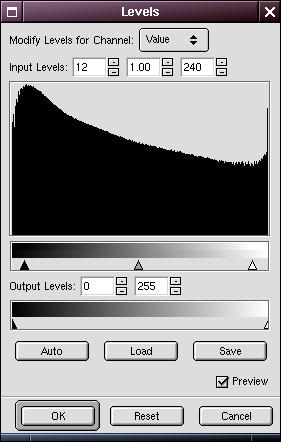
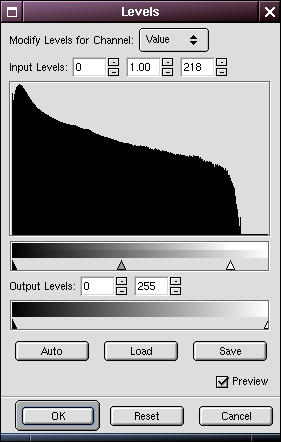
The next step is to adjust the tonality a little so that areas that need sharpening are really white and anything that doesn't need sharpening at all is really black.

Open the Levels dialog ( Image -> Colors -> Levels). Bring the black point up and the white point down to filter out any insignificant edges. You may need to play around with the exact positions of the sliders. Click OK when the image outlines the significant edges in white and most everything else is black.

How much you'll need to tweak this really depends on the image. There wasn't a lot of spurious edges shown here, so a small adjustment was all that was necessary.

Step 5

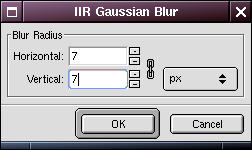
Now apply a gaussian blur ( Filters -> Blur -> Gaussian Blur) to smooth out the edges a little. A radius of between 3 and 10 pixels (horizontal and vertical) should be enough. In the example I used 7.

Step 6

If you want to you can use Levels again to adjust the white and black points of the mask. I find this is usually a good idea after the blur.

In this example I pulled the white point slider down a bit.

Step 7

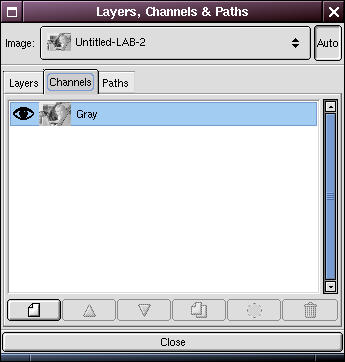
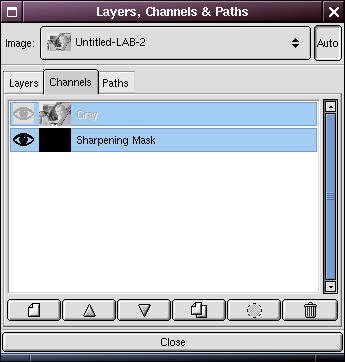
Open the Layers dialog. Select the LAB image (if HSV, value) in the drop down box at the top and then click on the Channels tab.
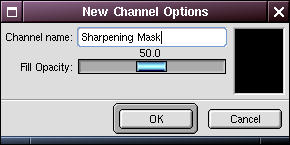
Click on the new channel button () at the bottom of the dialog to create a new channel. Name it "Sharpening Mask".

Step 8

Right-click in the blurred/edges image window and Select -> All. Right-click again and select Edit -> Copy. (Alternatively you can use keyboard shortcuts Ctrl+A and Ctrl+C in succession).

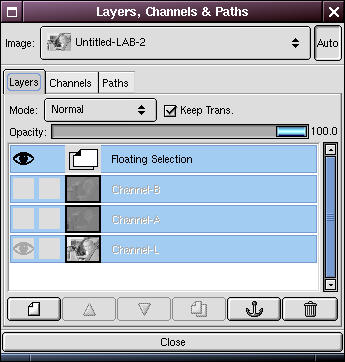
In the Layers dialog, make sure the Sharpening Mask channel is selected. Go back to the LAB (value) window and paste ( Edit -> Paste or Ctrl+V).

Select the Layers tab in the Layers dialog and click on the anchor button () to anchor the floating image.

Step 9

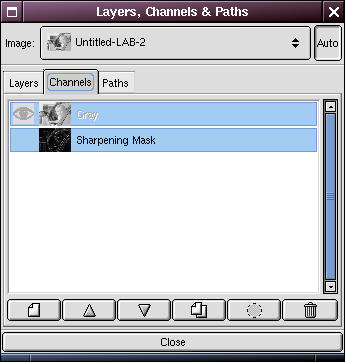
Click on the Channels tab in the Layers dialog. You should see a tiny version of the sharpening mask in the channel icon, indicating that you properly pasted the sharpening mask into the new channel. At this point you may wish to click on the eye icon to make the sharpening mask invisible.

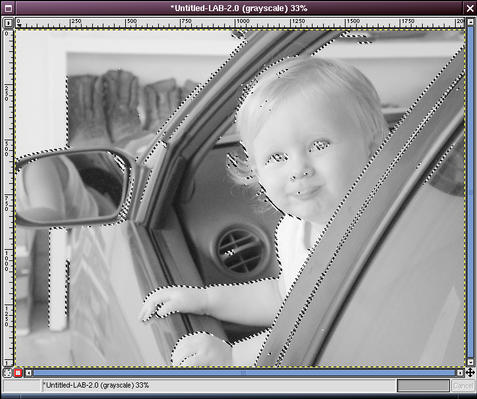
Select the Sharpening Mask channel and click the "Channel to Selection" button (). You should see "marching ants".

You can experiment with feathering the selection here if you want; I usually don't.

Step 10

Important: in the Layers dialog, click on the Layers tab and make sure the luminosity layer (if HSV, Background layer of Value window) is selected, and is the only one selected. We only want to sharpen the luminosity channel.

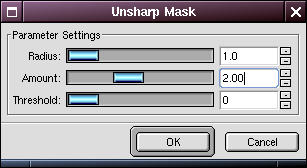
Apply an unsharp mask ( Filters -> Enhance -> Unsharp Mask). You may want to experiment with the settings here. You will find that you can use much higher amounts of sharpening (than if the entire image were selected) without significantly degrading the image.

In the example here I used Radius=1, Amount=2.0 (200% ?), Threshold=0.

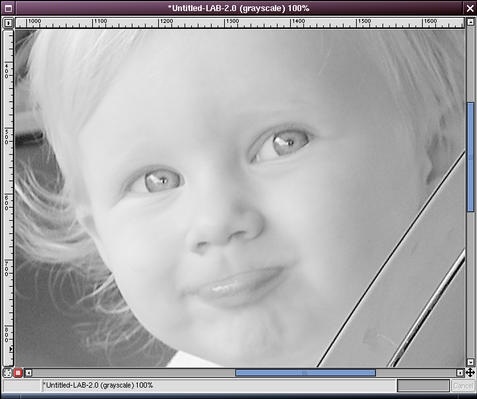
Now get rid of the selection (right-click and Select -> None) and zoom in (= key) to examine the results. If you're not happy with the results, undo and try the sharpen step again with different parameters.

Step 11

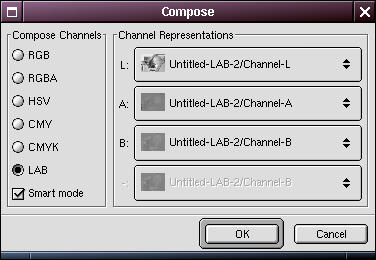
It's time to reconstruct our original image from the LAB (HSV) components.

Right-click in the luminosity (value) window and select ( Image -> Mode -> Compose). In the Compose Options dialog, make sure that you have selected LAB (HSV) on the left and on the right that the Luminosity, A and B (Hue, Saturation and Value) components are matched up with their respective images.

Click OK; this should create a new composite image.

Final Step

Examine the resulting image, zooming in to examine edge detail.

It may help to unminimize the original image for comparison. If you feel your image needs more/less sharpening, then go back to the LAB window, undo twice and redo the unsharp mask step above.

When you are satisfied with the result you can close all the extraneous windows.

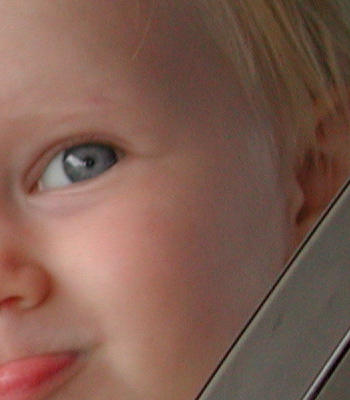
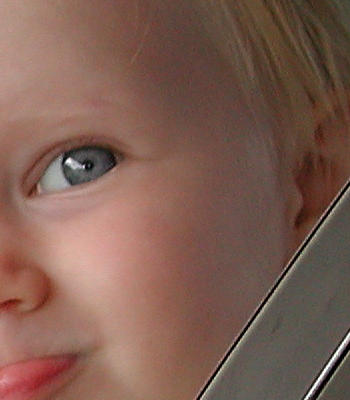
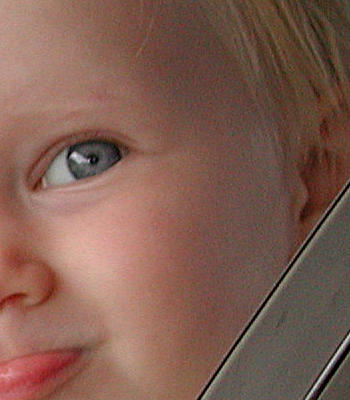
The images on the right are zoomed to 100% and cropped:

  • Left image: original image
  • Center image: smart-sharpened image
  • Right image: sharpened with a typical unsharp mask filter (Radius=1, Amount=1.0 (100% ?), Threshold=0)

The smart sharpened image hardly shows any additional noise over the original image. Notice how the "regular" unsharp masked version at half the sharpening amount has much more visible noise, especially in the shadows on the side of the face and in the door frame of the car.

Check out the shadow noise in the larger images on the smart sharpening shortcuts and variations page.

Tips

  • If this seems like too long and complicated of a process, you might be interested in looking at some shortcuts and variations that are still better than a simple sharpening step.
  • Some very well-respected experts on image manipulation (e.g. Real World Photoshop, Blatner and Fraser--great book) suggest that mode changes in and out of RGB are not to be taken lightly. You can lose a suprising amount of information. For example, try the following experiment:
  1. Open a new blank image.
  2. Using the gradient tool, create a gradient from black to white across it.
  3. Convert it to RGB ( Image -> Mode -> RGB).
  4. Look at it's histogram ( Image -> Colors -> Histogram).
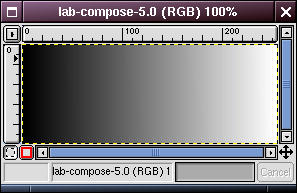
  5. Convert it to LAB, by decomposing to LAB ( Image -> Mode -> Decompose), then do a compose on the LAB image back to RGB ( Image -> Mode -> Compose).
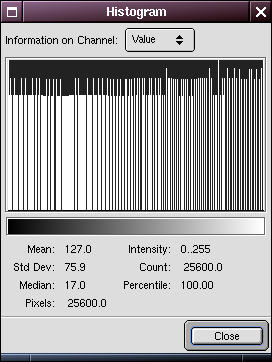
  6. Look at the new image's histogram.

Here is what you'll see if you compare them:

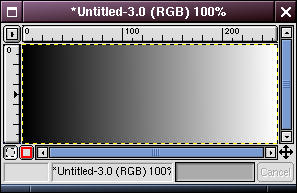
Left image: Gradient in RGB
Right image: RGB -> LAB -> RGB

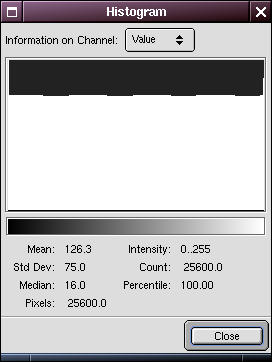
Left image: Histogram of the RGB image.
Right image: Histogram of the RGB -> LAB -> RGB image.

Left image: Zoom 400% of the RGB image.
Right image: Zoom 400% of the RGB -> LAB -> RGB image.

Look at all the information that has been lost in the converted image! There is obvious posterization in the zoomed close up.

You are now thinking to yourself, "Good grief! Why on earth would he suggest changing modes to sharpen the luminosity channel if it has this kind of effect?"

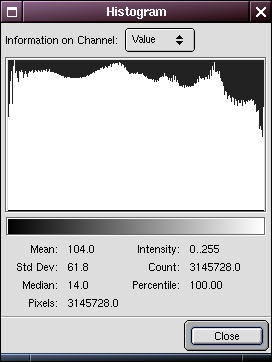
Look at the histograms of the original image and the one smart sharpened on the luminosity channel:

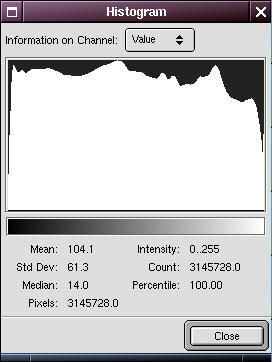
Left image: Histogram, original image
Right image: Smart-sharpened on luminosity channel

You can see that in practice, changing modes does not always have this drastic of an effect.

What should you do? I suggest trying it and look at the histogram! This is the beauty of the digital darkroom. If your image is not that noisy anyway, then no need to change modes, as suggested in the shortcuts. However, this does point out a general piece of advice, which is to use the histogram regularly. It is a great tool to monitor what is happening to your image "numerically" as you edit it.

Other Examples

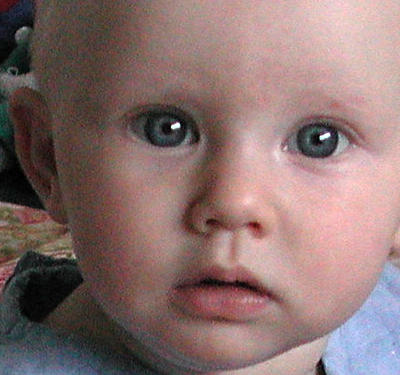
First image: Original (pretty noisy)
Left image: Standard unsharp mask
Right image: Smart sharpened

This example is kind of contrived. It doesn't really need much sharpening in the first place, and the smart-sharpened version looks over-sharpened. I include it here mainly because it is pretty noisy, so it really shows what happens when you sharpen noise, and how the smart sharpening technique doesn't affect the noise. For details on reducing CCD noise (using this image as an example), see this tutorial.

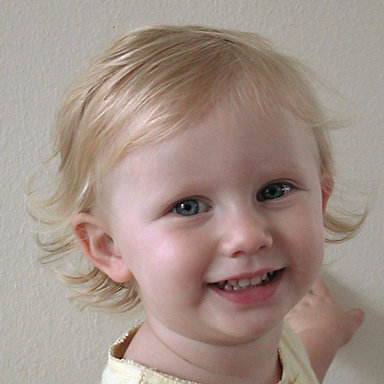
Left image: Edge sharpened (Amt=1.25)
Right image: Standard unsharp mask (Amt=0.50)

Intention

In this tutorial I'll show you how to do blend two different exposures of the same scene that you would like to combine to get the best parts of both images. This procedure works best if you have:

  1. (obviously) have shot two different exposures that would be pleasing to combine,
  2. had the camera mounted on a tripod (not strictly necessary, but helps greatly in aligning the images),
  3. the scenes are not too different at the boundaries of the blend. If the scene has changed too much (trees blowing, waves, people or cars moving, etc. between the images), especially at or near the "seams" of the blend, it will make the blend more difficult.

If you have only one image that needs exposure adjustment, you might look at using the "digital" neutral density filter or the contrast masking technique.

Giving credit where credit is due: I did not come up with this method. I adapted it for GIMP from a Photoshop tutorial on the luminous-landscape.com photography web site (great web site BTW, I recommend it).

The Procedure

The basic technique is to create a layer above the image that contains the other exposure of the same scene. Finally, we apply a layer mask to the this layer which makes parts of the image transparent that we want to show through from below.

Step 1

Here are the two exposures, loaded into GIMP. I am going to sandwich these on different layers and then combine them with a layer mask.

Step 2

The first decision is which one goes on top. In this case I have decided to put the lighter image on top and the darker one on the bottom. The reason is because I hand-held the shots, and they are far from aligned. I'm going to have to move the bottom image until the arch is aligned as best I can get it. Also, the top image is the composition I want anyway, and I'll have less painting to do that way.

Go the image that is going to be on the bottom. Open the Layers dialog (Ctrl+L) and click on the new layer button () to create a new layer.

Step 3

Go to the image that is going to be on top. Select all and copy (Ctrl+A then Ctrl+C). In the Layers dialog, make sure the new layer is selected, then go to the bottom image window and paste (Ctrl+V). In the Layers dialog, click on the anchor button () to anchor the floating image.

Step 4

Crank down the opacity of the upper layer so that you can see both images.

If they are perfectly aligned you can skip the next step. Unless you used a digital capture on a tripod, the images probably need to be aligned. (Even if you had a film camera on a tripod, it is difficult to get two successive scans to feed through in perfect alignment.)

Step 5

In the Layers dialog, select the layer you need to move or rotate. In this case it is the lower layer.

Using the arrow keys, nudge the image into alignment. You may need to rotate the image slightly too.

When you get close to alignment, zoom in to get a good close-up view and get the best possible fit.

Step 6

In the Layers dialog, right-click on the upper layer and select Add Layer Mask. In the Add Mask Options dialog, select White (Full Opacity) and click OK.

Step 7

Now I want to paint black (transparency) onto the layer mask wherever I want the lower image to show through.

To minimize painting time, use the hand-select ("lasso" ) tool to select a large, hand-drawn region just inside all the borders of the area you want to paint, as shown at right. Then using the fill tool () fill the selection with black.

Step 8

Next, I select a large opaque brush from the Brushes dialog (Dialogs/Brushes), select the Paint tool () and begin painting into the mask close to the boundaries of the blend.

Notice that I still have the opacity cranked down on the upper layer so that I can see both layers.

Step 9

For the very edges, I switch to a small, feathered brush and very carefully paint the edges.

While I'm painting, I'll zoom in and out frequently ("=" key to zoom in, "-" key to zoom out) to inspect the work. Don't worry too much about the borders, since we'll probably have to touch those up anyway.

Step 10

Now the most painstaking part: blending the seams. This is a little tricky due to the different tonalities of the two exposures.

For blending work, the Clone (), Smudge (), Airbrush () and Blur () are my tools of choice.

Since I'm not sure if these tools have the ability to work across layers (as they do in Photoshop), I duplicate the image (Ctrl+D) and flatten the duplicate ( Layers -> Flatten Image) and work on it. This has the additional benefit that if I ever mess up the blending job too badly I can always easily start over at this step.

Note: see this tutorial on correcting blown out highlights for another example of using these tools for blending and some useful tips on their use.

Here I've used primarily clone and a touch of smudge to blend the seams of the two exposures. I didn't do a very thorough job with this image, since it is more of an example and not something I'm planning to display at any significant size.

Note: notice the chromatic aberration of the lens in the form of purple fringing at the edge of the arch. These tools are great for dealing with that even if I were not blending two exposures.

Final Step

Finished. The image still has some problems with blown out highlights in the sunlight of the rock face. It is also a little too dark in the foreground shadow.

Intention

In this tutorial I'll show you how to salvage an image that has blown out highlights. This is a problem that is familiar to photographers shooting transparency film, which has an effective contrast range of about 5 stops. If you are not careful with your exposure you can easily lose all detail in your highlight areas, with no way to get it back: they "blow out" to clear (white).

Many digital cameras have similar issues, especially consumer level ones. With these kinds of cameras it is worth paying attention to the old adage: "expose for the highlights". I find that if I treat my digital camera as if I were shooting slide film the exposure rules are about the same.

The Procedure

The basic technique is to graft matching areas of the image into the burned out parts using the clone tool and then to use several additional tools to blend the seams of the cloned areas.

Step 1

Here is the original image.

I saw my cat go up into a lemon tree. Thinking there might be an interesting shot there, I grabbed the camera and shot him from several angles, including this shot through a hole in the foliage. When I saw the image later on the monitor I realized what a nice natural three-dimensional frame I had.

The camera was set on automatic exposure. While it did a great job of exposing for the dark cat in the shade of the tree, there are several spots where specular reflections of the bright sunshine overhead blew out. The worst and most noticable is the one off of the leaf at the top of the image. There are some less objectionable, but bothersome burned out areas to the lower right of the cat's face.

Great image...could I rescue it?

Step 2

Using the color picker tool, you can see that there is no usable information left in the highlight. Pure white, of course, is 255/255/255.

If there had been some detail left here I might have tried a variation on the contrast masking technique or the "digital" neutral density filter first.

Step 3

The first step is to create a channel mask to be able to mask out parts of the image we don't want to affect. I'll use this for the main "pixel graft".

Duplicate the original image ( Image -> Duplicate or Ctrl+D).

In the duplicate, select Image -> Colors -> Threshold. In the threshold dialog box, drag to select the very right (extreme highlights) portion of the histogram. Alternatively, you can type in the lower bound, as I did here (250).

This causes all the pixels in the image from 250-255 to go white and all the others to go black.

Step 4

Go back to the original image, and bring up the Layers and Channels dialog ( Layers -> Layers, Channels & Paths, or Ctrl+L). Click on the Channels tab and add a new channel by clicking on the new channel button.

Step 5

Go back to the threshold image, Select -> All (Ctrl+A) and Edit -> Copy (Ctrl+C).

Edit -> Paste it into the original image (it should go into the new channel).

Click on the Layers tab and anchor the floating selection.

You can close the threshold image now.

Step 6

Click on the Channels tab again, and right click on the new channel and select Channel to Selection (Ctrl+S). You may want to also click on the eye beside the channel to turn off visibility of the channel.

Now feather the selection ( Select -> Feather). I used a value of 15 pixels or so in this case.

Finally (important!), click back on the Layers tab and select the Background layer, so the selection and further operations will apply to the image and not the channel mask.

Step 7

Now the real work begins.

We've lost these pixels entirely, so we're going to have to graft some on from somewhere nearby using the clone tool. A description of how to use this tool is beyond the scope of this document (see the GIMP savvy to find out more about this tool).

I cloned from the light part of the leaf just beyond the dark band to the right of the blown out area. This gave me a similar light-dark-light transition. You can see the clone tool options and the brush ( Dialogs -> Brushes) I selected (at right).

Zoom in and clone until you have the area filled with a realistic facimile of the missing detail. Most likely it will have a noticable transition around the edges. That's OK, we'll fix that up next.

Select -> None and zoom out to inspect your work.

Step 8

This step is where the most difficult work occurs. I must by necessity abbreviate this step, since it involves iterations of applying the following tools:

  • smudge
  • clone
  • airbrush (w/color picker)
  • convolve (blur)

Basically, smudge is your friend after a serious cloning job like this to clean up the transitions. Smudge around all the edges of the clone. The clone tool can also be used again here and there for "mop-up" work.

I use the airbrush and convolve/blur tools to do fine touch up on the smudge job and make it totally seamless with the rest of the leaf.

Tips:

  • Make small changes so you can undo easily without having to redo a lot of work.
  • Experiment with the tool options, especially opacity, rate and pressure (double-click on a tool to see the tool options). Some examples I used here are shown at right.
  • Vary your brushes! You generally want a nice feathered edge for smoothing seams. Some examples I used here are shown at right.
  • When using the airbrush, use the color picker first to sample a pixel. I average a pixel value as shown in the color picker options, right.
  • Periodically, zoom in and out to examine your work. The zoom keys are incredibly handy for this ("=" key to zoom in, "-" key to zoom out). When you really think you are done, examine the image at full-screen. Remember that when you print something at 16x20 or 20x30 you may expose flaws in your retouching that you didn't see at small sizes.

Right Image: zoomed view after the clone (previous step) and after this step.

Step 9

I went on to address the specular highlights to the lower right of the cat's face: spots of sunlit grass that burned out. These are not as bad, but I noticed them on a 16x20 print I had made and they bothered me, so toned them down a little.

Here are the original (left image) and finished images (right image).

Subscribe to: Posts (Atom)