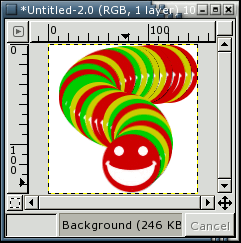
Along with the brushes already included, you can create custom brushes using three methods. Simple shapes are created using th button labelled New at the bottom of the brush selection dialog. Complex black and white brushes can be created by saving a grayscale image as using the .gbr file extension. The content of such a brush is treated line an alpha-channel. This means that any pixel that is pure white is treated as transparent. However, in this tutoria we will be creating brushes that use pictures with colour and this brush will also have multiple images.
Step 1
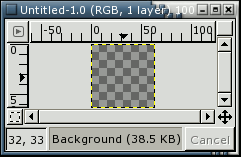
Create a new image the size of the brush you will be creating. For our example, we will be creating a 64x64 image. Create it with a transparent background.
Step 2
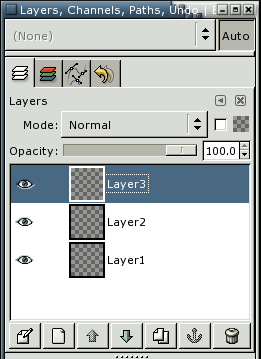
Go to the Layers dialog and create additional layers with the fill type Transparent (if necessary, delete or clear the background layer if you forgot to make it transparent when creating the image).
Give them any name you want. We will be just naming them Layer1, Layer2, and Layer3. The layer name really don't matter in this case.
Step 3
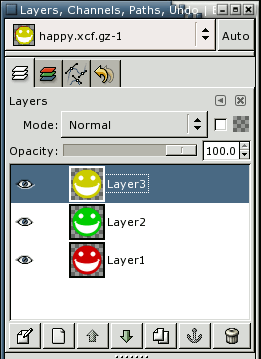
Draw the images you want in the layers that were already created. In our case we will be drawing a picture of a happy face in 3 colours (red, green and yellow). At the end your layers should look something like this (see image above). You can save a copy of your image in .xcf format now, in case you want to edit it later.
Step 4

The last step is to save your brush as a GIMP picture brush. The extension of this kind of brush is .GIH. So right click on the image, then choose File -> Save As.... IF you want the GIMP to be able to use your new brush, you have to save it in the "brushes" folder inside your personal GIMP folder (for Linux and other UNIX systems, this is usually in "~/.gimp-2.2/brushes/"). So select that folder and type in a name for the brush. For our example, the brush was named happy.gih
The Save As Pixmap Brush Pipe dialog will ask you how you want to save the image. Since we have 3 layers make sure to put 3 in the Ranks edit box. You can also choose how you want the images to appear as you move the mouse aruond. In most cases Random will do fine.
NOTE: The Spacing (Percent) means how much space is left before the next image is drawn. If the value is lower, then the image will be drawn more frequently. You can also adjust this value in the Brush dialog.
Final
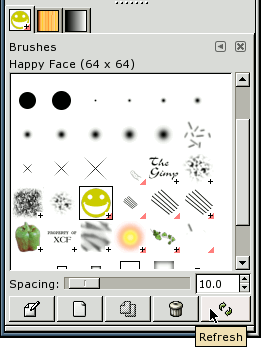
To see our brush, go to the Brushes dialog and hit the Refresh button. Our happy image should appear in the dialog. If it doesn't, make sure you have saved the brush in the GIMP "brushes" folder and that it has an extension of .GIH.
You will note that our little picture on the right has a little red triangle in the bottom right corner. This tells us that the brush contains multiple pictures. You can click on the brush image and hold the mouse button to see a preview of the brush. The brush animation will show you that it contains the three images.
Let's test our brush. Select our brush from the brush dialog, create a simple image and start drawing.
