Intention


In this tutorial I'll show you how to do smart sharpening of your images. Applying an unsharp mask to an entire image is not always appropriate. A really good example of this is when you have an image with a lot of high ISO noise or film grain; applying across-the-board sharpening will enhance the noise/grain and make it even more visible, especially in large prints. Often there will be large areas of the image that you know you don't want to sharpen (e.g. a blue sky--the blue channel tends to get a lot of noise).
This technique does two "smart" things to avoid sharpening noise:
- sharpen only the luminosity channel, and
- create a channel mask that contains only the edges in the image. Then you can load the channel mask as a selection and apply the unsharp mask to just the edges.
Giving credit where credit is due: I did not come up with this method. I adapted it for GIMP from a Photoshop tutorial on the luminous-landscape.com photography web site (great web site BTW, I recommend it).
New information and comparison with the "warp sharp" script!
The Procedure
You may want to maximize your browser window to properly see this tutorial. I didn't want to shrink the image windows down like I usually do for the other tutorials since sharpening and noise are subtle and really show up better at these larger sizes.
Step 1
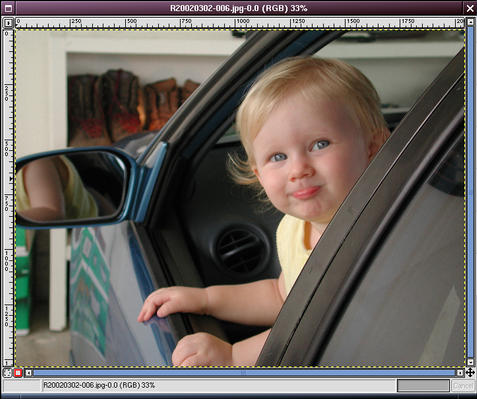
Here's the original image loaded into GIMP. It is noticeably soft, probably due to bad autofocus. It really shows up in prints.
Note: be sure to do any other editing that you want to on the image first, especially downsampling or upsampling (resizing). Sharpening should always be the last step that you do.
Step 2
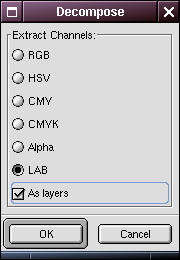

Duplicate the image by pressing Ctrl+D or right-click and select Image -> Duplicate. It might be wise to minimize the original image window now. You can open it later to compare to the result.
Right-click on the duplicate image and select Image -> Mode -> Decompose. In the decompose dialog box, select LAB (or HSV; see Note 1). Check the "As layers" checkbox (see Note 2) and click OK.
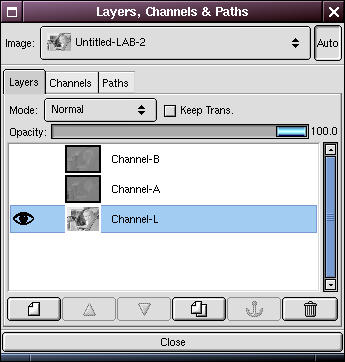
This will create a new window with the image decomposed into the Luminosity ("brightness"), A and B channels as 3 layers. This will allow us to isolate and sharpen the luninosity channel which is a) the most important, and b) should be the cleanest in terms of noise.
At this point I usually turn off visibility of the A and B layers in the Layers dialog by clicking on the "eyes".
Note 1: if you happen to have an older version of the compose/decompose plug-in it may not have the LAB option. In that case use HSV (hue/saturation/value) instead. For any reference to the "LAB" image or "luminosity" channel below, substitute the "HSV" image/"value" window. The LAB option was not in my initial version of GIMP (ver 1.2.1), but I got the newer version of the plug-in at the GIMP Plug-in Registry and compiled it myself. Don't worry if you don't have it; HSV works great too.
Note 2: in the older version of the decompose plug-in there is no "As layers" checkbox; instead it will create the three channels as separate windows rather than three layers in one window. It really doesn't matter if you do it this way; the layers way just reduces the clutter on your screen. If you don't have the "As layers" option, I suggest you minimize (but not close) the hue and saturation (or A and B) windows. We'll need them later, but you don't want to accidentally pick one of them in the next few steps.
Step 3
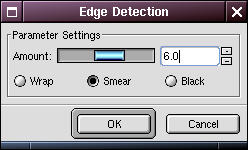
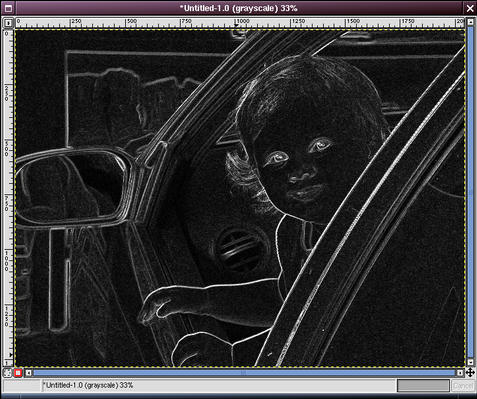
Go to the duplicate image. Right-click and select Filters -> Edge Detect -> Edge. In the Edge Detect dialog box, select a parameter value of the appropriate size for the edges in your image. You may need to experiment with this. For the example image I chose 6.
Now convert the edges image to grayscale by right clicking on it and selecting Image -> Mode -> Grayscale. This image is going to become our sharpening mask.
Note: in some tutorials they recommend converting to greyscale and then running the edge detection filter. The premise there (my guess) is that perhaps you don't want to find noise as edges. My thinking is that there may be an edge in color, but not tonality (e.g. transition between two light colors). Once you have converted to greyscale you may not be able to detect that edge any more. Besides, with a high enough edge detection parameter (here 6) you will avoid detecting random CCD noise as edges.
Step 4
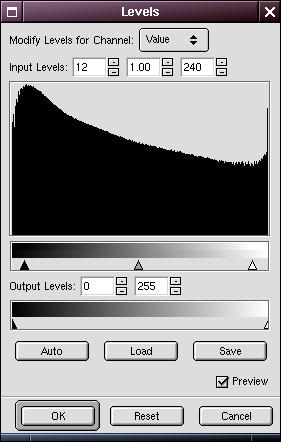

The next step is to adjust the tonality a little so that areas that need sharpening are really white and anything that doesn't need sharpening at all is really black.
Open the Levels dialog ( Image -> Colors -> Levels). Bring the black point up and the white point down to filter out any insignificant edges. You may need to play around with the exact positions of the sliders. Click OK when the image outlines the significant edges in white and most everything else is black.
How much you'll need to tweak this really depends on the image. There wasn't a lot of spurious edges shown here, so a small adjustment was all that was necessary.
Step 5
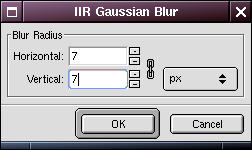

Now apply a gaussian blur ( Filters -> Blur -> Gaussian Blur) to smooth out the edges a little. A radius of between 3 and 10 pixels (horizontal and vertical) should be enough. In the example I used 7.
Step 6
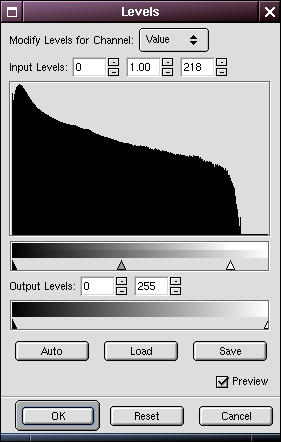
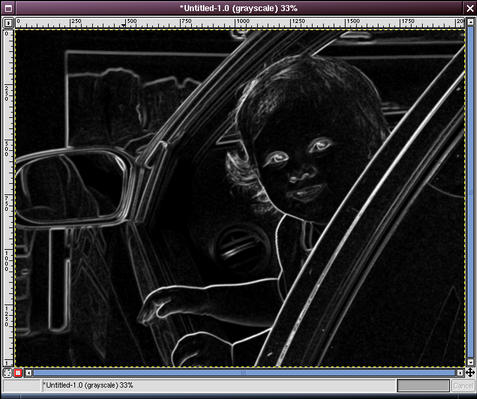
If you want to you can use Levels again to adjust the white and black points of the mask. I find this is usually a good idea after the blur.
In this example I pulled the white point slider down a bit.
Step 7
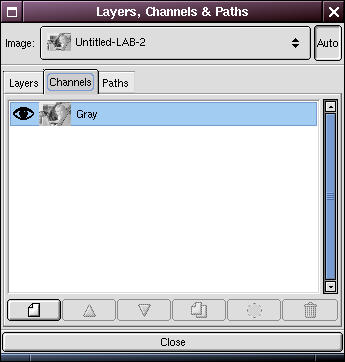
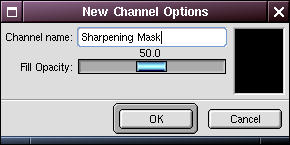
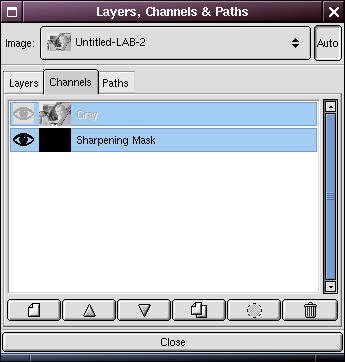
Open the Layers dialog. Select the LAB image (if HSV, value) in the drop down box at the top and then click on the Channels tab.
Click on the new channel button ( ) at the bottom of the dialog to create a new channel. Name it "Sharpening Mask".
Step 8
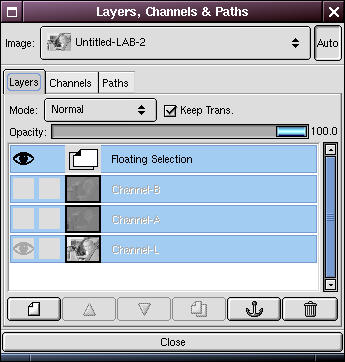
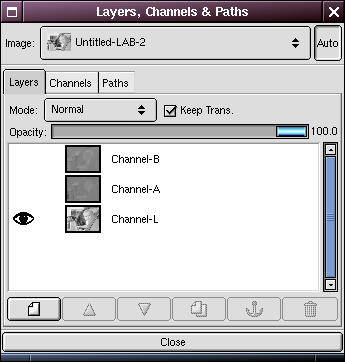
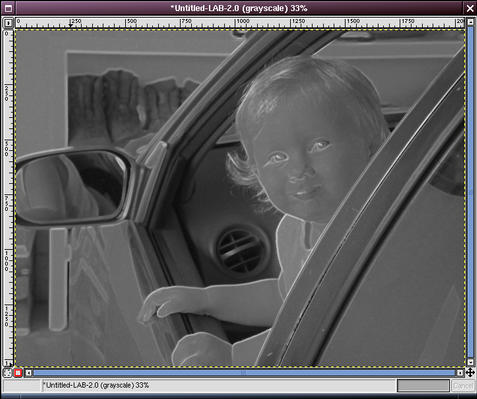
Right-click in the blurred/edges image window and Select -> All. Right-click again and select
Edit -> Copy. (Alternatively you can use keyboard shortcuts Ctrl+A and Ctrl+C in succession).
In the Layers dialog, make sure the Sharpening Mask channel is selected. Go back to the LAB (value) window and paste ( Edit -> Paste or Ctrl+V).
Select the Layers tab in the Layers dialog and click on the anchor button ( ) to anchor the floating image.
Step 9
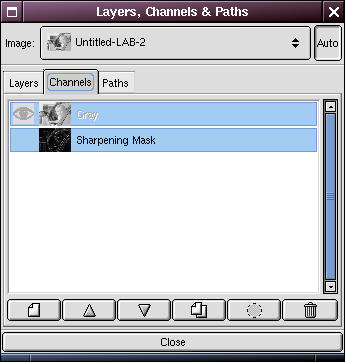
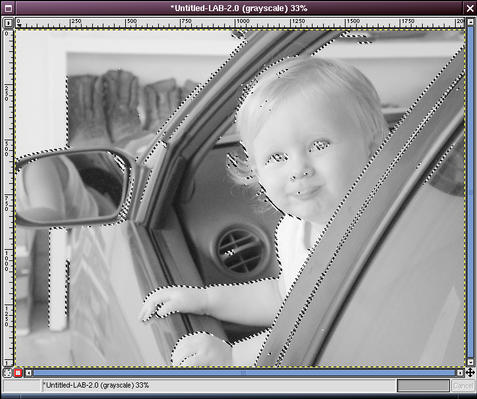
Click on the Channels tab in the Layers dialog. You should see a tiny version of the sharpening mask in the channel icon, indicating that you properly pasted the sharpening mask into the new channel. At this point you may wish to click on the eye icon to make the sharpening mask invisible.
Select the Sharpening Mask channel and click the "Channel to Selection" button ( ). You should see "marching ants".
You can experiment with feathering the selection here if you want; I usually don't.
Step 10

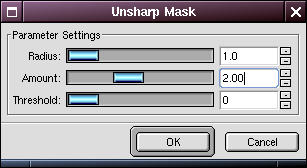
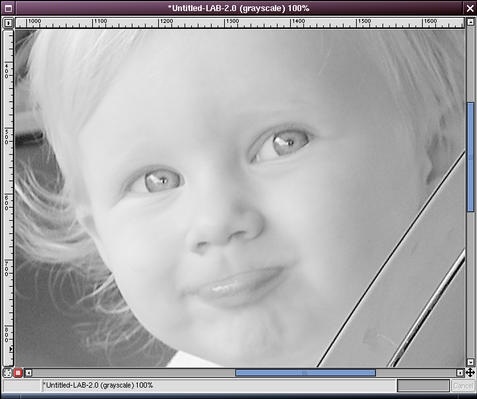
Important: in the Layers dialog, click on the Layers tab and make sure the luminosity layer (if HSV, Background layer of Value window) is selected, and is the only one selected. We only want to sharpen the luminosity channel.
Apply an unsharp mask ( Filters -> Enhance -> Unsharp Mask). You may want to experiment with the settings here. You will find that you can use much higher amounts of sharpening (than if the entire image were selected) without significantly degrading the image.
In the example here I used Radius=1, Amount=2.0 (200% ?), Threshold=0.
Now get rid of the selection (right-click and Select -> None) and zoom in (= key) to examine the results. If you're not happy with the results, undo and try the sharpen step again with different parameters.
Step 11
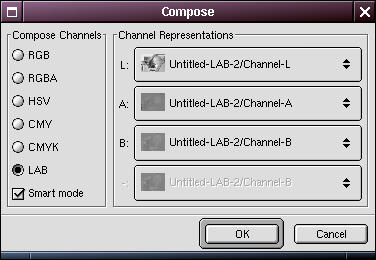

It's time to reconstruct our original image from the LAB (HSV) components.
Right-click in the luminosity (value) window and select ( Image -> Mode -> Compose). In the Compose Options dialog, make sure that you have selected LAB (HSV) on the left and on the right that the Luminosity, A and B (Hue, Saturation and Value) components are matched up with their respective images.
Click OK; this should create a new composite image.
Final Step
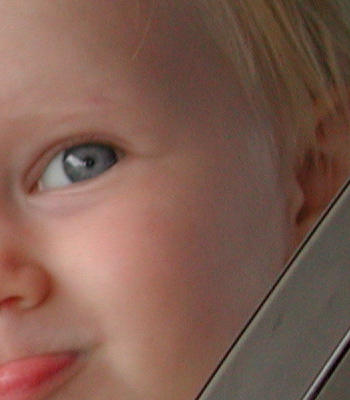
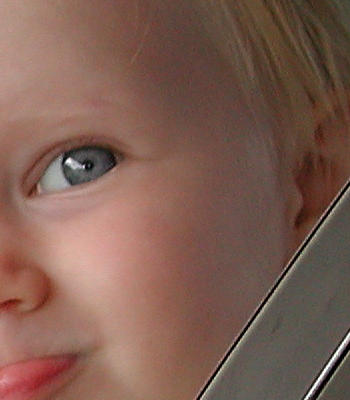
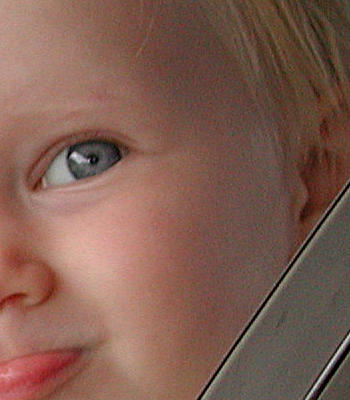
Examine the resulting image, zooming in to examine edge detail.
It may help to unminimize the original image for comparison. If you feel your image needs more/less sharpening, then go back to the LAB window, undo twice and redo the unsharp mask step above.
When you are satisfied with the result you can close all the extraneous windows.
The images on the right are zoomed to 100% and cropped:
- Left image: original image
- Center image: smart-sharpened image
- Right image: sharpened with a typical unsharp mask filter (Radius=1, Amount=1.0 (100% ?), Threshold=0)
The smart sharpened image hardly shows any additional noise over the original image. Notice how the "regular" unsharp masked version at half the sharpening amount has much more visible noise, especially in the shadows on the side of the face and in the door frame of the car.
Check out the shadow noise in the larger images on the smart sharpening shortcuts and variations page.
Tips
- If this seems like too long and complicated of a process, you might be interested in looking at some shortcuts and variations that are still better than a simple sharpening step.
- Some very well-respected experts on image manipulation (e.g. Real World Photoshop, Blatner and Fraser--great book) suggest that mode changes in and out of RGB are not to be taken lightly. You can lose a suprising amount of information. For example, try the following experiment:
- Open a new blank image.
- Using the gradient tool, create a gradient from black to white across it.
- Convert it to RGB (
Image -> Mode -> RGB).
- Look at it's histogram (
Image -> Colors -> Histogram).
- Convert it to LAB, by decomposing to LAB (
Image -> Mode -> Decompose), then do a compose on the LAB image back to RGB (
Image -> Mode -> Compose).
- Look at the new image's histogram.
Here is what you'll see if you compare them:
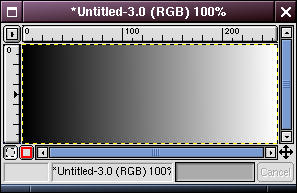
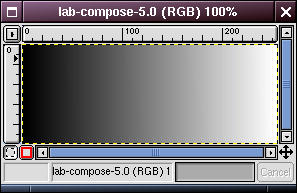
Left image: Gradient in RGB
Right image: RGB -> LAB -> RGB
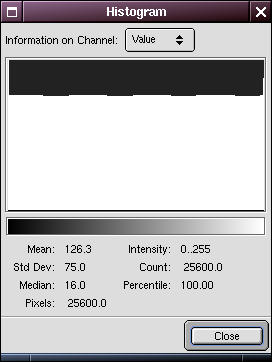
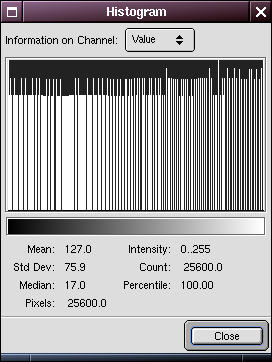
Left image: Histogram of the RGB image.
Right image: Histogram of the RGB -> LAB -> RGB image.
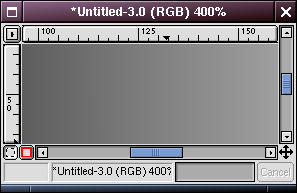
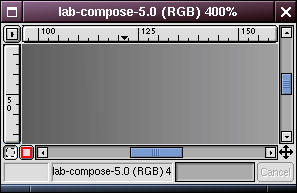
Left image: Zoom 400% of the RGB image.
Right image: Zoom 400% of the RGB -> LAB -> RGB image.
Look at all the information that has been lost in the converted image! There is obvious posterization in the zoomed close up.
You are now thinking to yourself, "Good grief! Why on earth would he suggest changing modes to sharpen the luminosity channel if it has this kind of effect?"
Look at the histograms of the original image and the one smart sharpened on the luminosity channel:
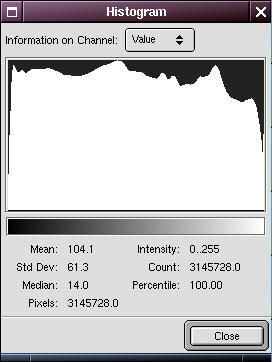
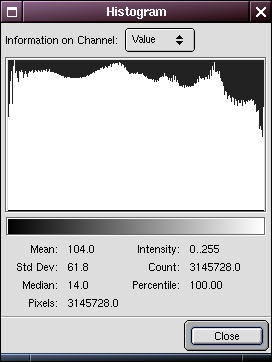
Left image: Histogram, original image
Right image: Smart-sharpened on luminosity channel
You can see that in practice, changing modes does not always have this drastic of an effect.
What should you do? I suggest trying it and look at the histogram! This is the beauty of the digital darkroom. If your image is not that noisy anyway, then no need to change modes, as suggested in the shortcuts. However, this does point out a general piece of advice, which is to use the histogram regularly. It is a great tool to monitor what is happening to your image "numerically" as you edit it.
Other Examples
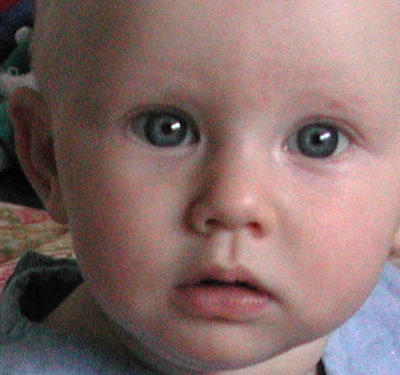

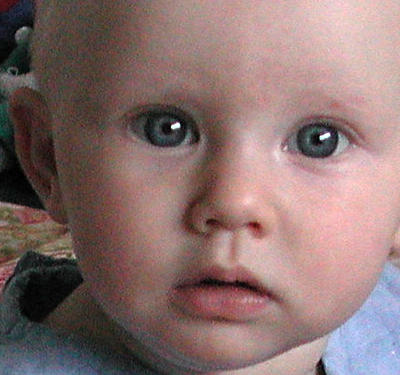
First image: Original (pretty noisy)
Left image: Standard unsharp mask
Right image: Smart sharpened
This example is kind of contrived. It doesn't really need much sharpening in the first place, and the smart-sharpened version looks over-sharpened. I include it here mainly because it is pretty noisy, so it really shows what happens when you sharpen noise, and how the smart sharpening technique doesn't affect the noise. For details on reducing CCD noise (using this image as an example), see this tutorial.
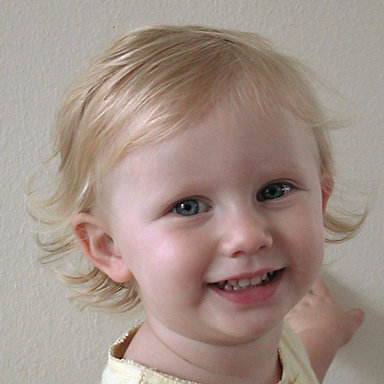

Left image: Edge sharpened (Amt=1.25)
Right image: Standard unsharp mask (Amt=0.50)